
12x24 Tile Pattern
The 12x24 running bond pattern lays one of the most widely sold large-format tile sizes with a 1/3 offset between rows, instead of the traditional 50% half-lap, following manufacturer and industry guidance to limit lippage on a tile this size.
Last updated: 2026-08-06
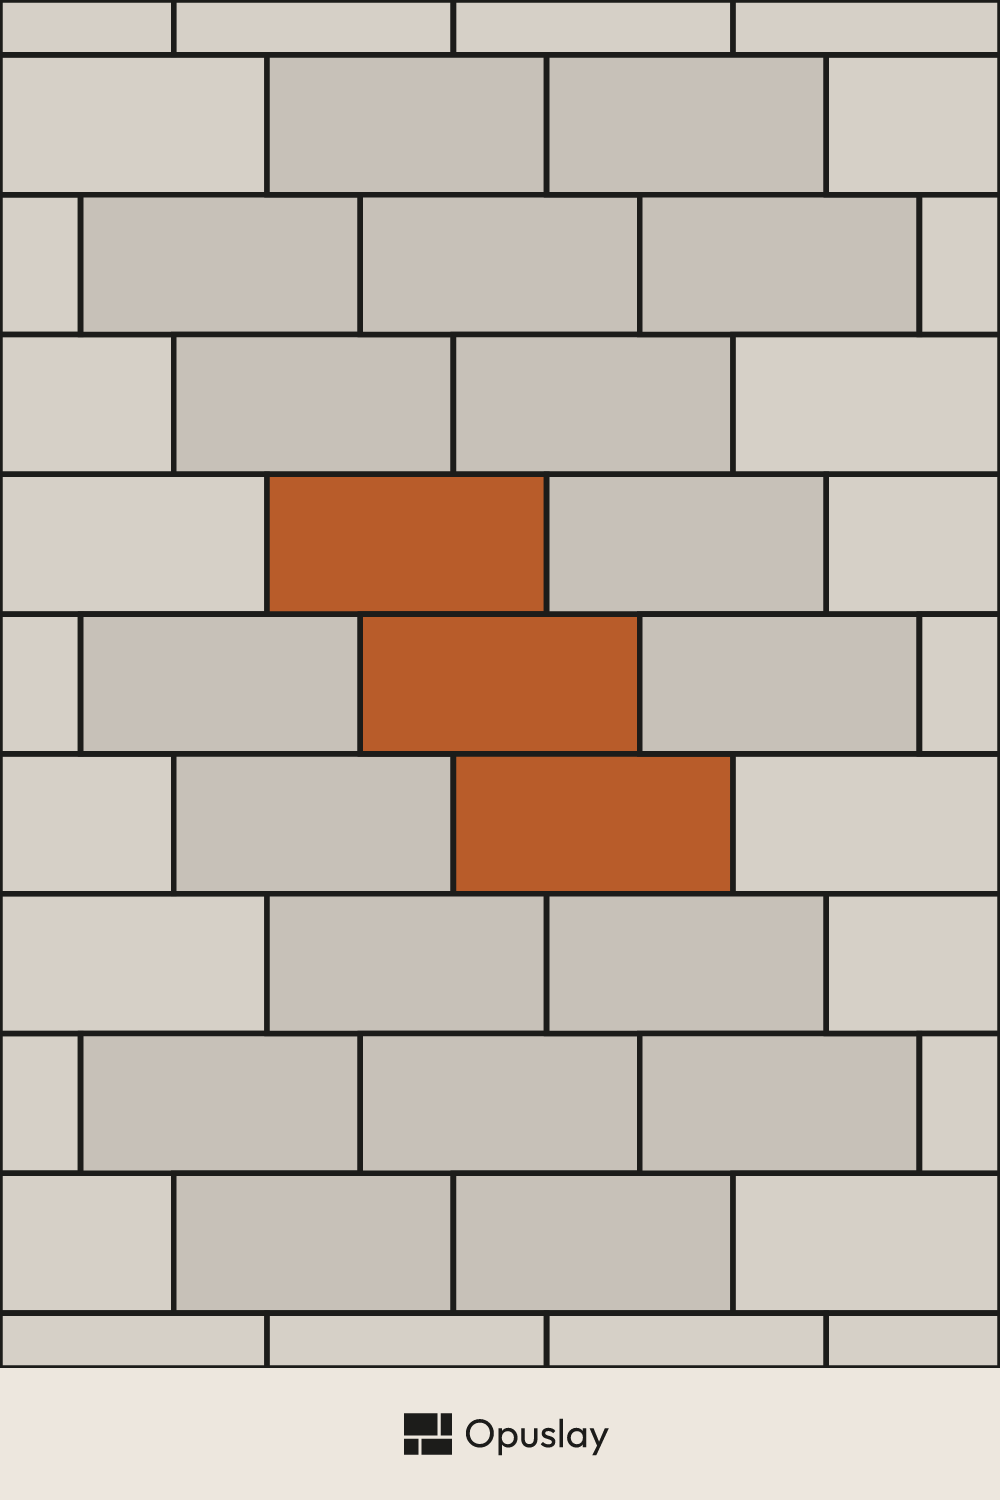
12x24 1/3 Offset Running Bond
Opuslay — tile layout worksheet- Room:
- 3 m × 2.5 m
- Units:
- Metric (cm / m²)
- Anchor:
- Left · Top
- Layout angle:
- Straight
- Tile colours:
- Single colour
Material breakdown
| Format | Qty / Pattern | Share | Qty / Room | Area / Room |
|---|---|---|---|---|
| 30x60 cm | 3 | 100.0% | 51 | 7.50 m² |
| Total | 3 | 100% | 51 | 7.50 m² |
What you'll need to buy
Tiles to buy
| 30x60 cm | 48 tiles | 8.64 m² |
Total 48 tiles · 8.64 m² (incl. 15% cuts & breakage)
Adhesive & grout
- Thin-set adhesive: ≈ 40.5 kg (2 × 50 lb bags) — recommended trowel: 12mm notch, large format
- Grout — the tile sets the joint width, not you:
- ≈ 1.7 kg (1 × 10 lb bag) — 3mm joint, rectified / tight-set tile
- ≈ 2.9 kg (1 × 10 lb bag) — 5mm joint, natural or non-rectified tile
Adhesive: allow a little over on an uneven substrate, or if you back-butter large tiles — both eat more than a flat bed.
Grout: the 25 lb bag is the usual size (10 lb for small jobs). Buy it in one go and stick to a single bag size: bags from different batches can dry to slightly different shades.
It's the tile that decides the joint, not the setter — dry-lay a section to find your width. Assumes 9.5mm tile depth; adjust for your product — thicker tiles need more.
Share & export
Save the 12x24 1/3 Offset Running Bond layout to your moodboard, or send the link to your tiler — it reopens with your room dimensions.

About the 12x24 1/3 Offset Running Bond
12x24 is among the best-selling large-format tile sizes in the US, used interchangeably on floors and walls, which makes its pattern one of the most frequently searched tile layouts by both homeowners and installers.
Because a 24-inch tile falls well beyond the roughly 15-inch threshold cited in ANSI A108.02, a 1/3 offset is the layout most manufacturers recommend to avoid lippage, and it has become the de facto standard running-bond ratio for this size.
Every 12x24 size on this page is a grid dimension — the tile plus its grout joint. A nominal 12x24 tile is a slightly smaller fired tile set on a 300x600 mm grid, the joint making up the difference; the calculator counts grid cells, which is exactly what you set out on the floor, so the tile count is exact rather than an estimate. Large-format porcelain this size is usually sold rectified — cut to a precise size — so it sits on a tight, even joint.
How to Lay 12x24 Tile in a 1/3 Offset
A 1/3 offset means each row starts a third of a tile along from the row below — 8 inches on a 24-inch tile. Do that three times and you are back where you started, which is why the vertical joints only fall back into line every third row, against every second row at 50%. That is the whole difference between the two layouts, and it is what makes the 1/3 version read as a pattern rather than a grid.
Where you start matters more than most guides admit. Lay a full tile against the most visible edge and you push every cut to the wall nobody looks at; centre the pattern instead and the room comes out symmetrical, with two matching cut rows. The calculator lets you move that starting point and shows the cut tiles move with it — before you spread any adhesive.
Direction is the other free choice. Running the long side of the tile down the length of the room makes the space read longer; running it across makes it read wider. On a wall the 24-inch dimension almost always goes horizontally, which is also what keeps the offset reading as a bond rather than a stack.
Dry-lay the first three rows before fixing anything. Three rows is exactly where the pattern repeats, so it is the shortest run that tells you whether the offset lands where you want it and whether any tile in the batch shows visible warp. If a cut row comes out as a thin sliver at one end, shift the starting point half a tile and split the difference between both ends.
Frequently Asked Questions
What is a running bond tile pattern?
A running bond — also called a brick joint — sets each row of tile shifted sideways against the row below, so the vertical joints never run through in a continuous line. How far it shifts is what names the variant: a 50% offset puts each joint at the middle of the tile below, a 1/3 offset moves it only a third of the way along. On a tile as long as 12x24, the 1/3 version is the one to use.
What offset should I use for 12x24 tile?
Most manufacturers and the ANSI A108.02 guideline recommend a 1/3 offset for 12x24 tile rather than a full 50% offset, to reduce the risk of lippage on a tile this large.
Can 12x24 tile be used on both floors and walls?
Yes — 12x24 is one of the most versatile large-format sizes, sold in floor-rated porcelain as well as lighter wall tile, which is part of why it's such a popular size. The calculator covers both: switch the surface from floor to wall and you can set out up to three walls at once, each with its own width and its own starting point, all sharing the same pattern and the same height.
How much waste should I allow for a 12x24 running bond floor?
You don't have to guess at a flat percentage here. The calculator sets the pattern out across the real dimensions of your room, then counts what each cut actually leaves behind: offcuts long enough to start another row are put back to work, the rest is waste. A 1/3 offset happens to be efficient that way — the piece cut off the end of one row is often what starts the next. What comes back is a figure for your room and your tile size, with a breakage margin on top, rather than a blanket 10%.
Is running bond the most common layout for 12x24 tile?
Yes — a 1/3 offset running bond is the layout most commonly chosen for 12x24 tile, both because it's the manufacturer-recommended default and because it suits the tile's rectangular proportions well.
Why not use a 50% offset on 12x24 tile?
A 50% offset on a 24-inch-long tile significantly increases the risk of visible lippage if the tile has any slight warp, which is why the industry-recommended maximum for tile this size is closer to 1/3. The two are easy to tell apart once they are down: at 50% the vertical joints line up again every 2 rows, at 1/3 only every 3 rows — and it is that longer repeat that keeps small differences between tiles from collecting into a visible ridge.
How wide should the grout joint be for 12x24 tile?
Joint width isn't a free choice. ANSI A108.02 §4.3.8 ties it to how much the tiles vary in size (their caliber): the joint must be at least three times that variation, and never less than 1/16". On large-format tile over 15" on a side the practical minimum is about 1/8" for rectified tile (3/16" if it isn't rectified), plus a little more if the tiles show any warp. Rectified 12x24 usually sits near that 1/8" minimum.